Learn how to use Dexcom Share and Dexcom Follow.
The CIM community is like an amazing source of information with experts across a diverse range of topics joining us at events across the country. This year, we’re working to distil many of the tips and things we’ve learned into digestible chunks. Throughout the year, expect to see recaps from some of our favourite Slipstream sessions, how-to guides based on things we’ve learned during Hot Topics sessions, and information we just couldn’t keep to ourselves.
If you have questions or something you’d like crowd-sourced and answered, share your question with us by sending us an email at: info@connectedinmotion.ca
Disclaimer: Please check out CIM’s Partners Page to learn more about the companies we work with. This post was not paid for and does not represent sponsored content, but it’s important to recognize that we may be biased based on the fact that some companies highlighted below support CIM in different ways. We still thought this info was important for you to know about.
SETTING UP DEXCOM SHARE
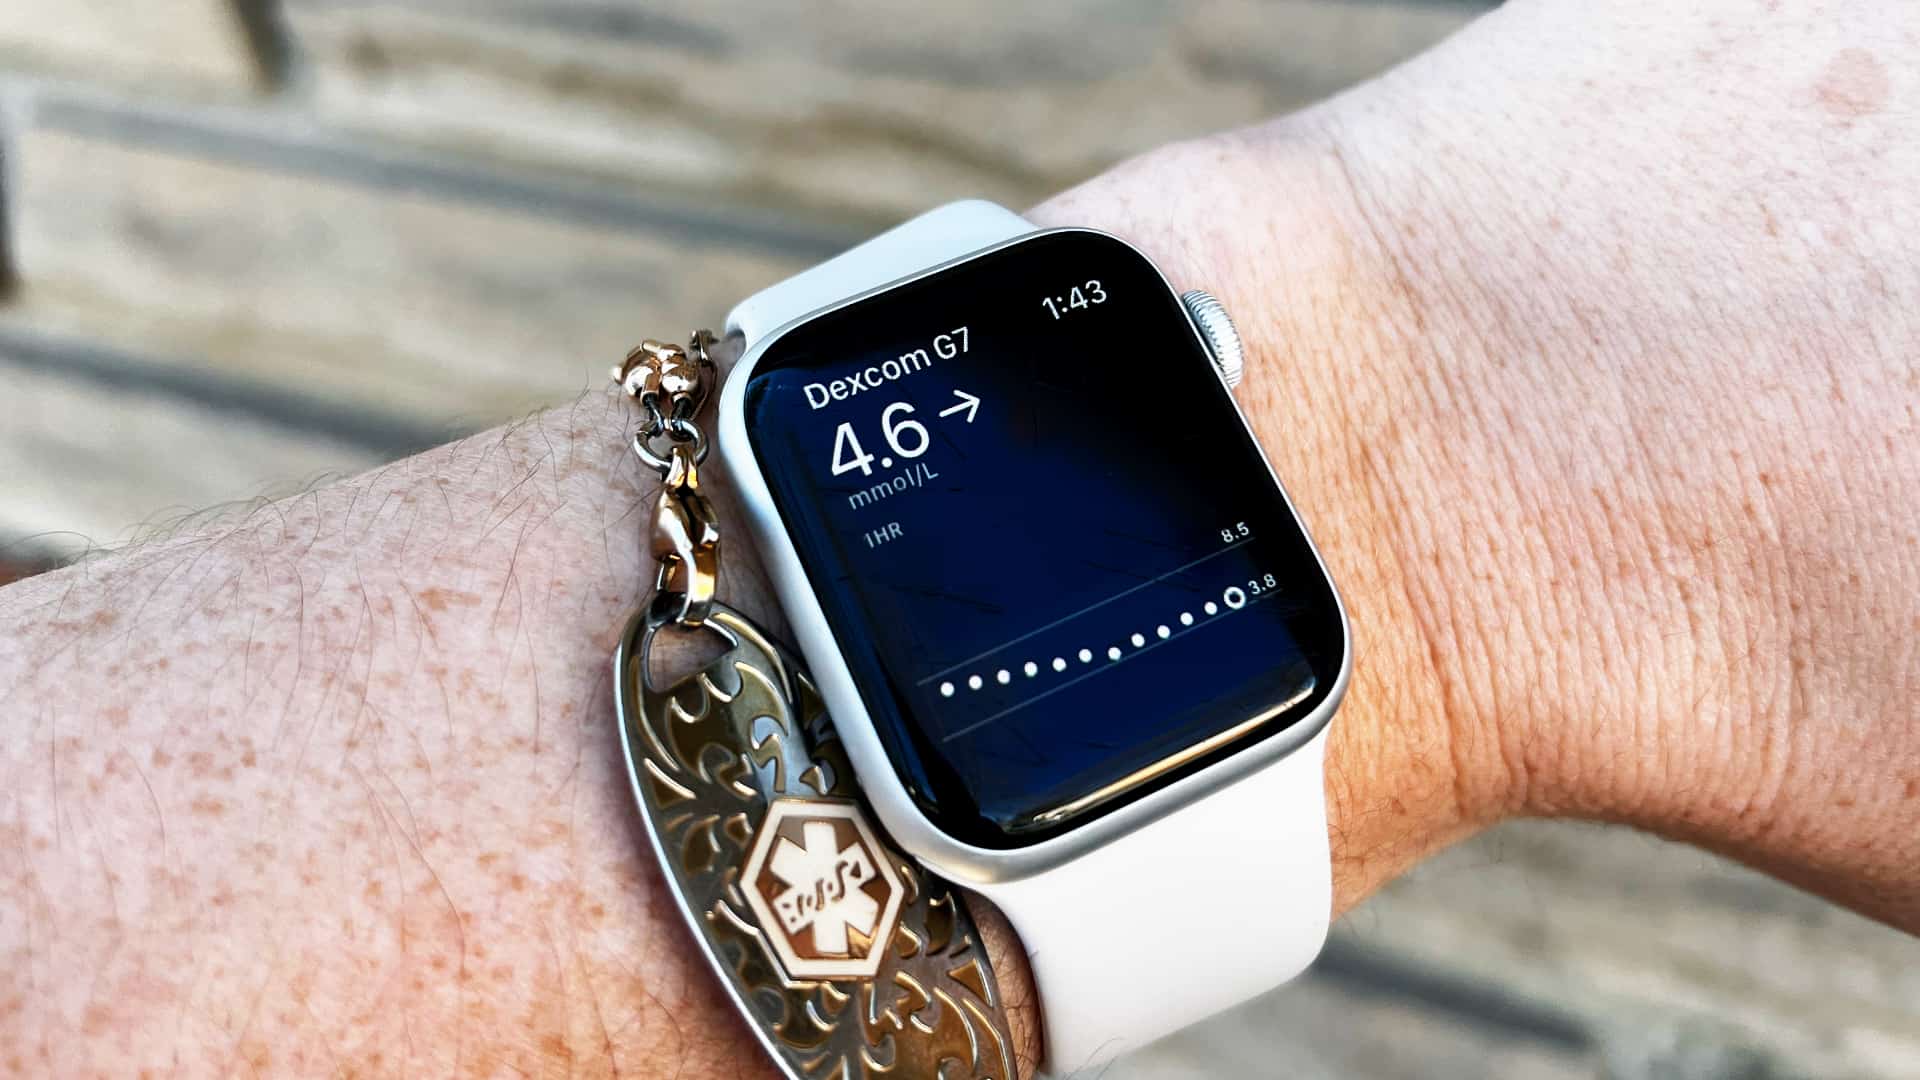
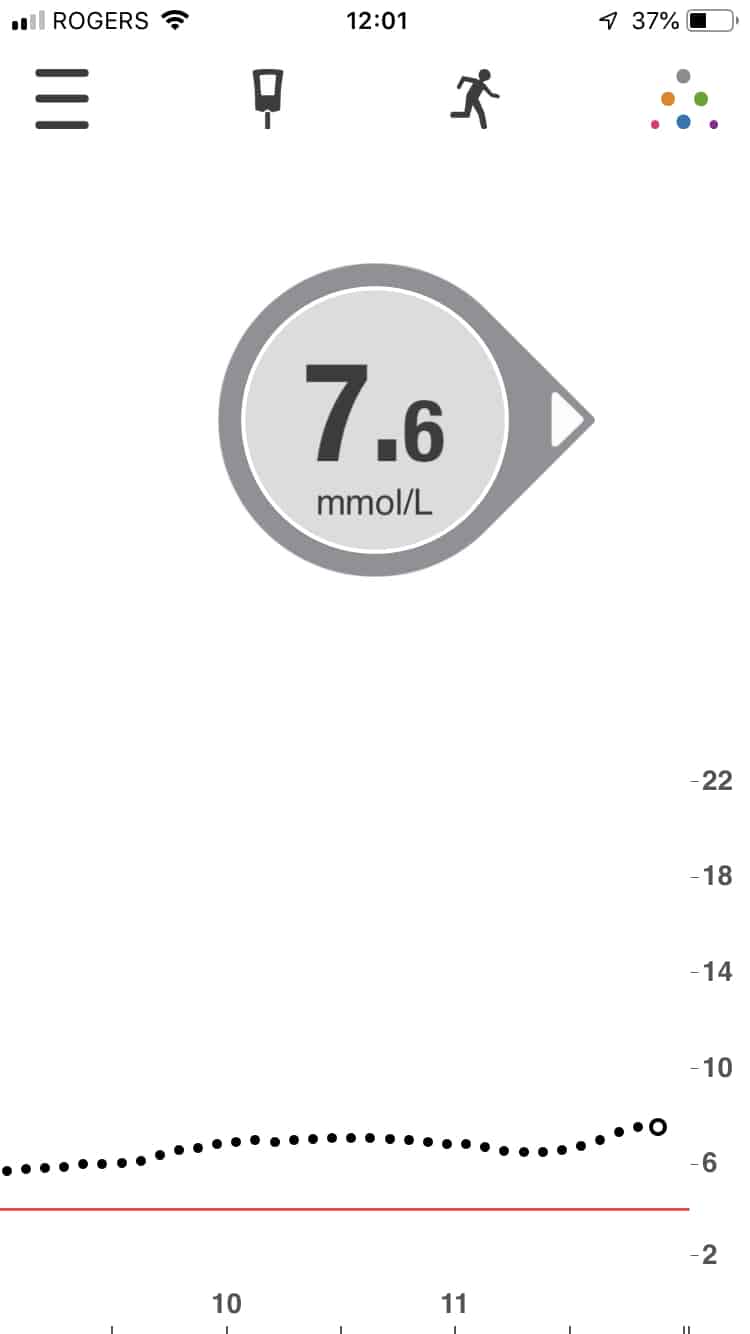
Here’s how to set-up Dexcom Share and the Dexcom Follow app, so friends or family members can see your BG data remotely.
WHAT YOU NEED TO GET STARTED
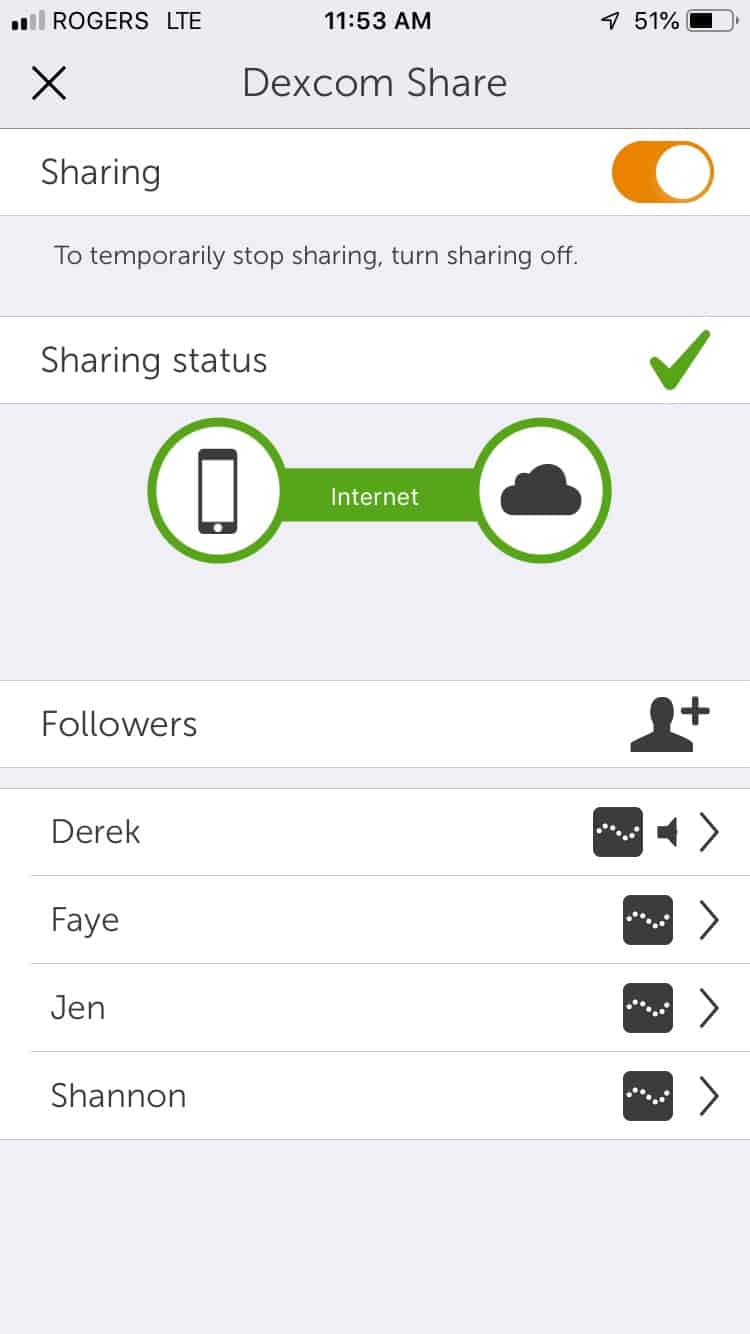
ADD A NEW FOLLOWER
In the Dexcom app, tap the pyramid in the top right corner. This will take you to your Share settings. Turn Sharing ON.
Click the “+” button to add a new Follower, then enter a nickname and email. You can add up to five Followers.

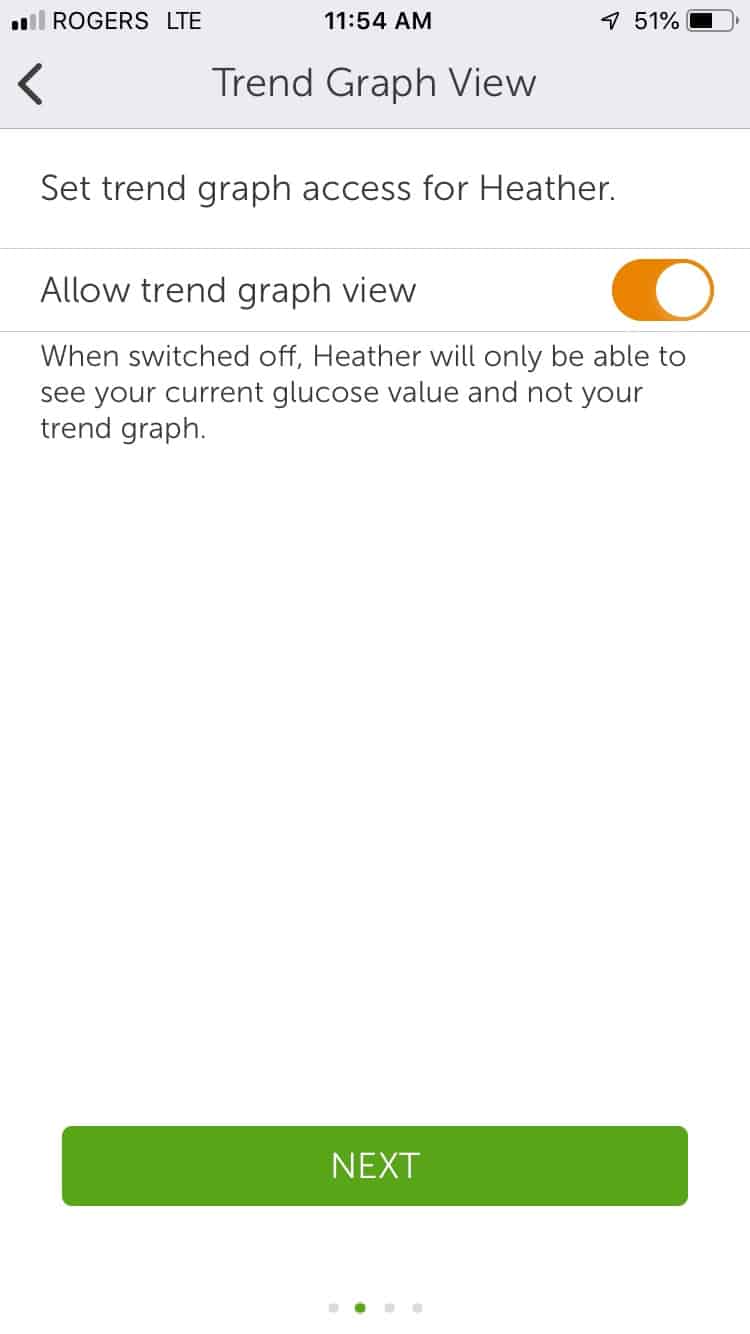
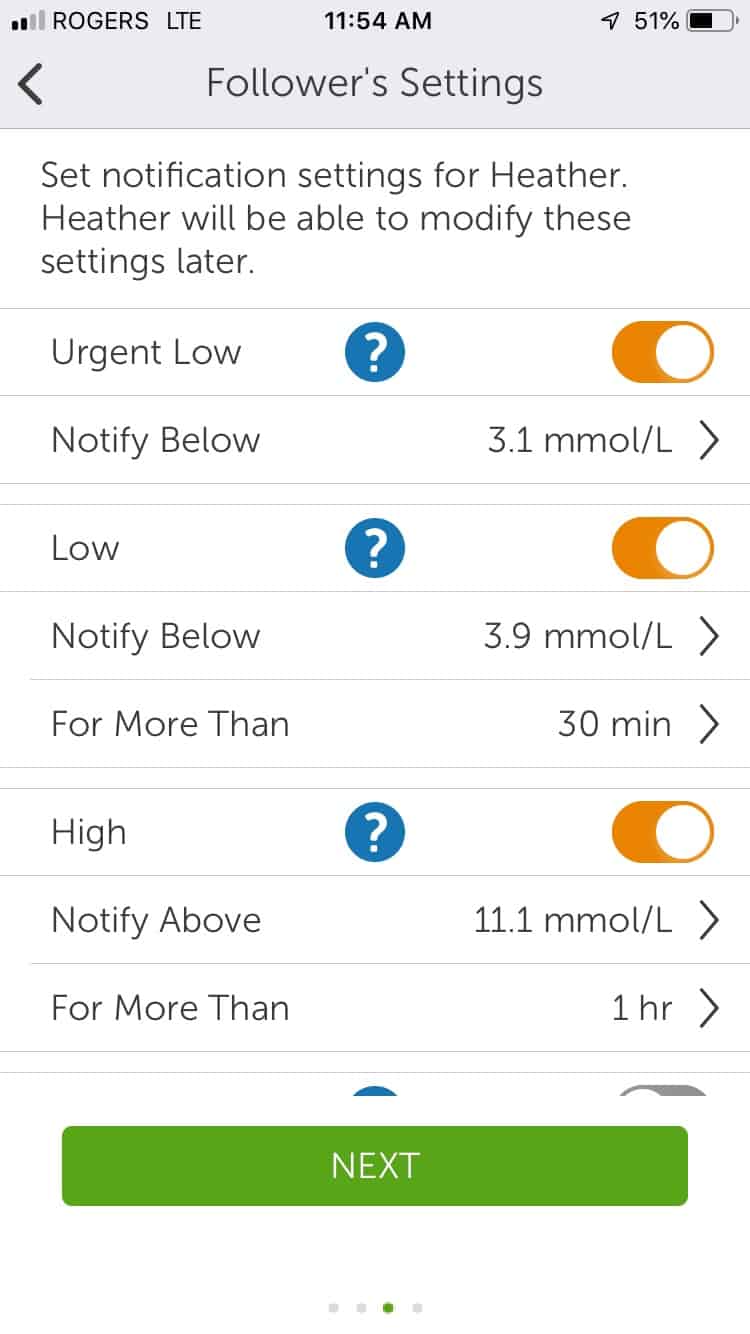
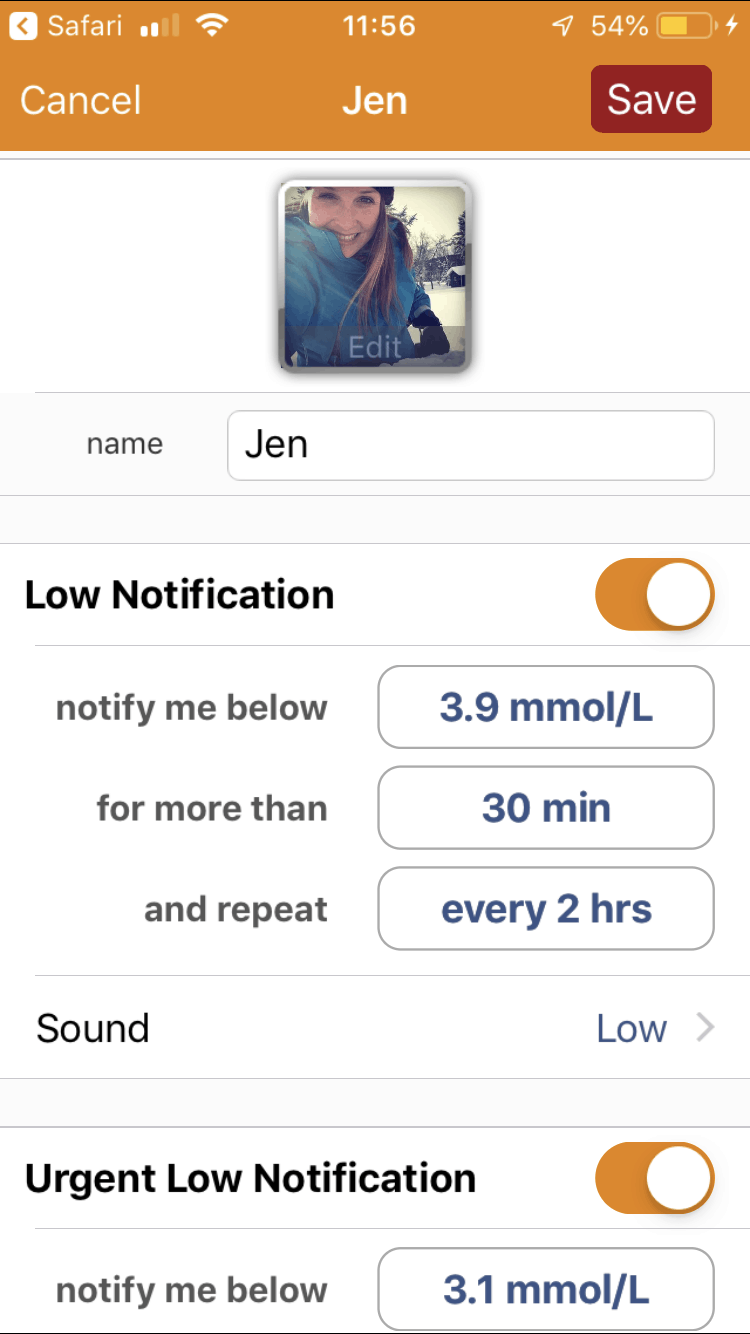
CUSTOMIZE FOLLOWER SETTINGS
Choose which alerts and notifications a Follower will receive, and when. You can customize these for each individual follower, including BG thresholds and time spent above or below that threshold.
- Trend Graph View (ON/OFF) — when OFF, Followers will only see BG value and trend arrow
- Urgent Low alert (ON/OFF) + (Notify below ___ mmol/L)
- Low alert (ON/OFF) + (Notify below ___ mmol/L) + (For more than ___ min)
- High alert (ON/OFF) + (Notify below ___ mmol/L) + (For more than ___ min)
- No More Data alert (ON/OFF)
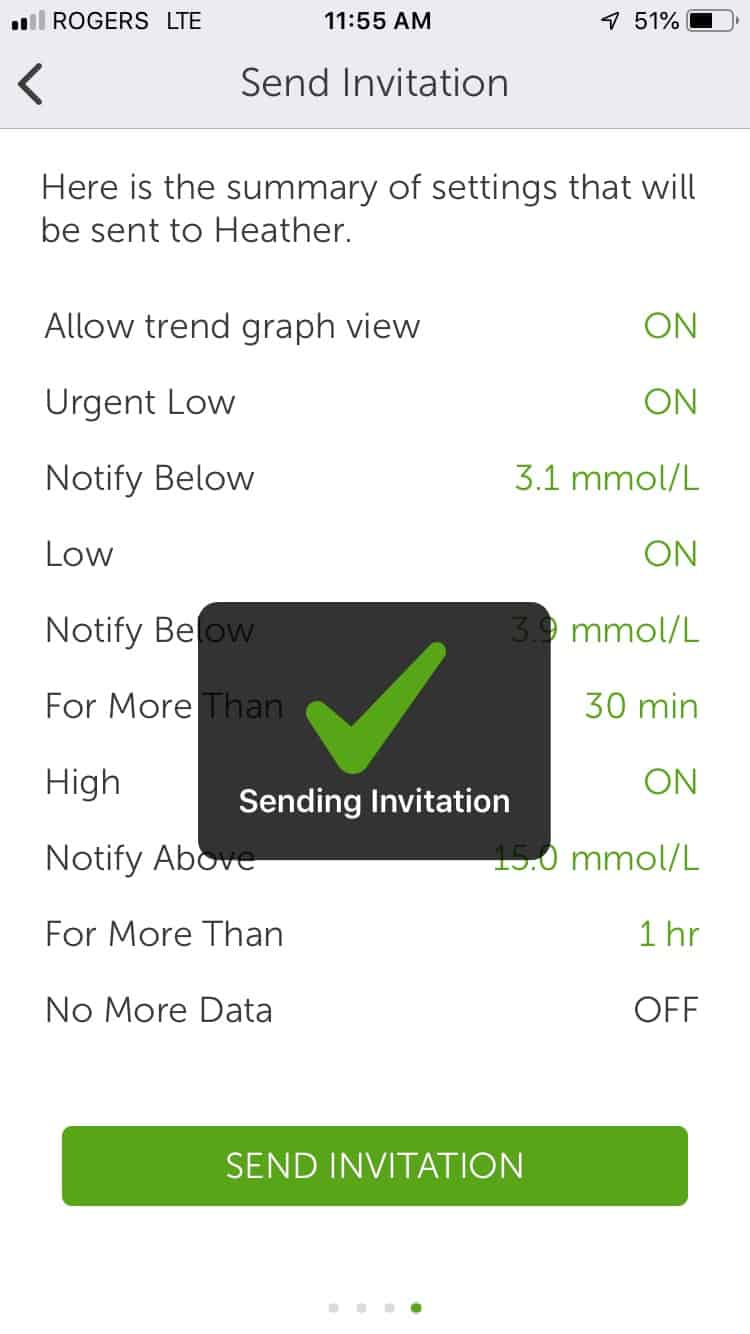
Once you’ve confirmed the settings, an email invitation is sent to the Follower. Sharers can remove a Follower at any time.
SET UP DEXCOM FOLLOW APP
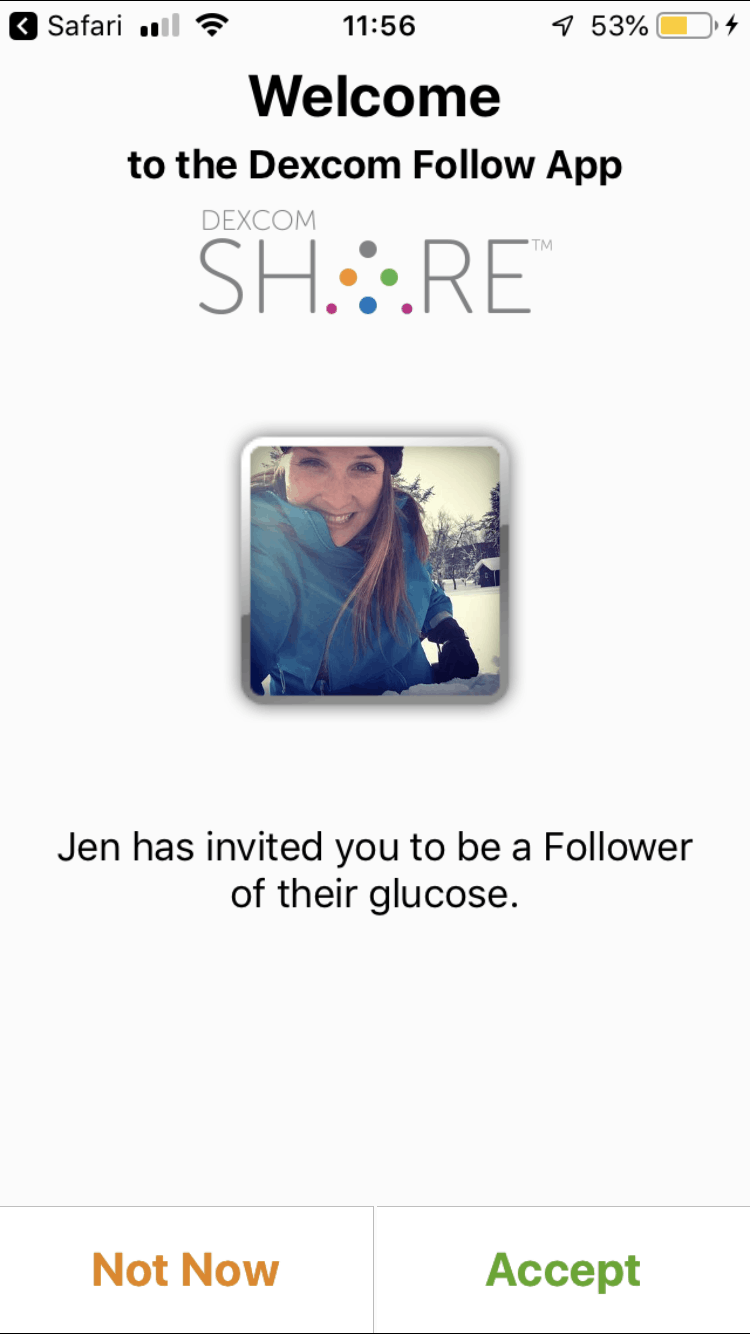
Finally, a Follower must set up the Dexcom Follow app on their smart device. Followers will receive an invitation email from the Sharer. Use the links included to download the Follow app and accept the invitation to follow a Sharer.
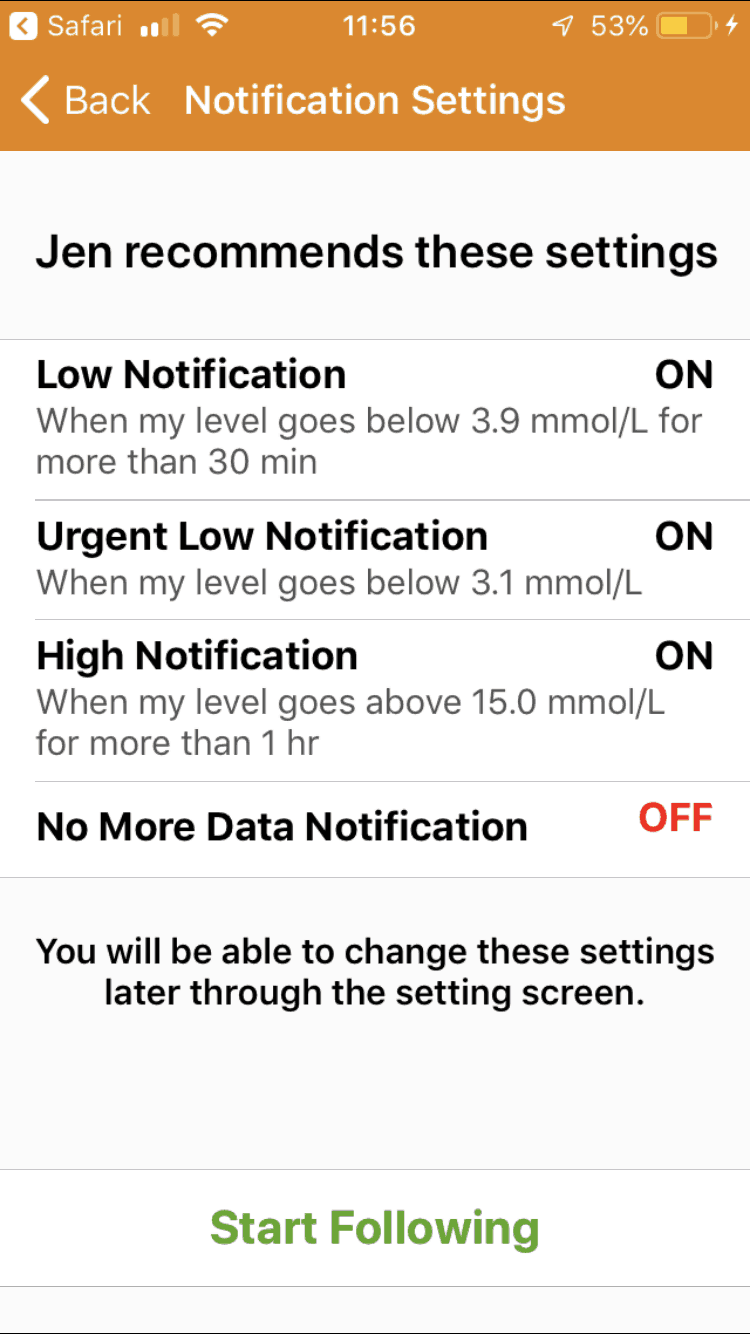
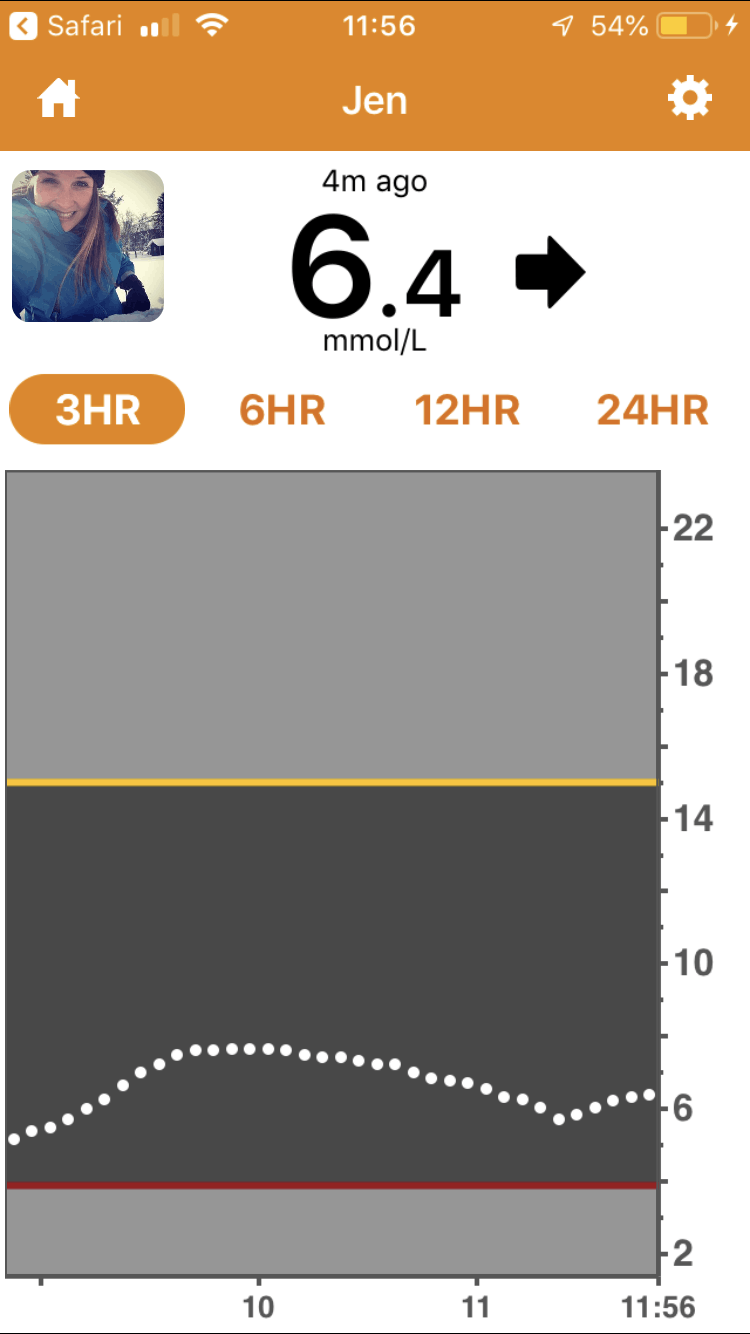
Followers will see the “recommended settings” the Sharer has customized for them. Followers can customize alert settings within the permissions given by the Sharer. Followers cannot turn Trend Graph View ON if the Sharer has turned it OFF.
The Follower can now view the Sharer’s BG data when they open the Follow app and will receive any applicable alerts.
Do you have an idea for our Lessons Learned blog? Something you have always been wondering, or something you’ve learned that was a real ‘AHA’ moment for you? Get in touch. Send your ideas to info@connectedinmotion.ca