Disclosure: This article reflects the ideas and opinions of Connected in Motion, however, it is important to recognize that Connected in Motion works closely with the team at Dexcom Canada as a sponsor.The content will share tips on maximizing your Dexcom G7 experience. It is essential to recognize the nature of our partnerships. We invite readers to visit our Partners Page to understand more about the organizations that support Connected in Motion. [Images from dexcom.com archives and Colorado Slipstream 2023]
Now that the Dexcom G7 is available for users in both Canada and the US, we wanted to share some ideas for maximizing your Dexcom G7 experience. We’ve polled the community, compiled your hottest tips, and shared them below.
Did we miss something? Leave us a comment!
1. Preparation for Seamless Transitions
If you’ve used a CGM in the past, you may know the challenges associated with the warm-up period. We’ve heard from the community about rollercoaster glucose levels during or shortly after the warm-up period as a result of being without your glucose readings for the duration of the warm-up.
A warm-up period is essential because it allows the sensor to settle and become accurate in measuring glucose levels. During the warm-up period, the sensor establishes a strong connection with the interstitial fluid in your body and stabilizes its readings. This initial period of acclimation is necessary to ensure reliable and consistent glucose monitoring.
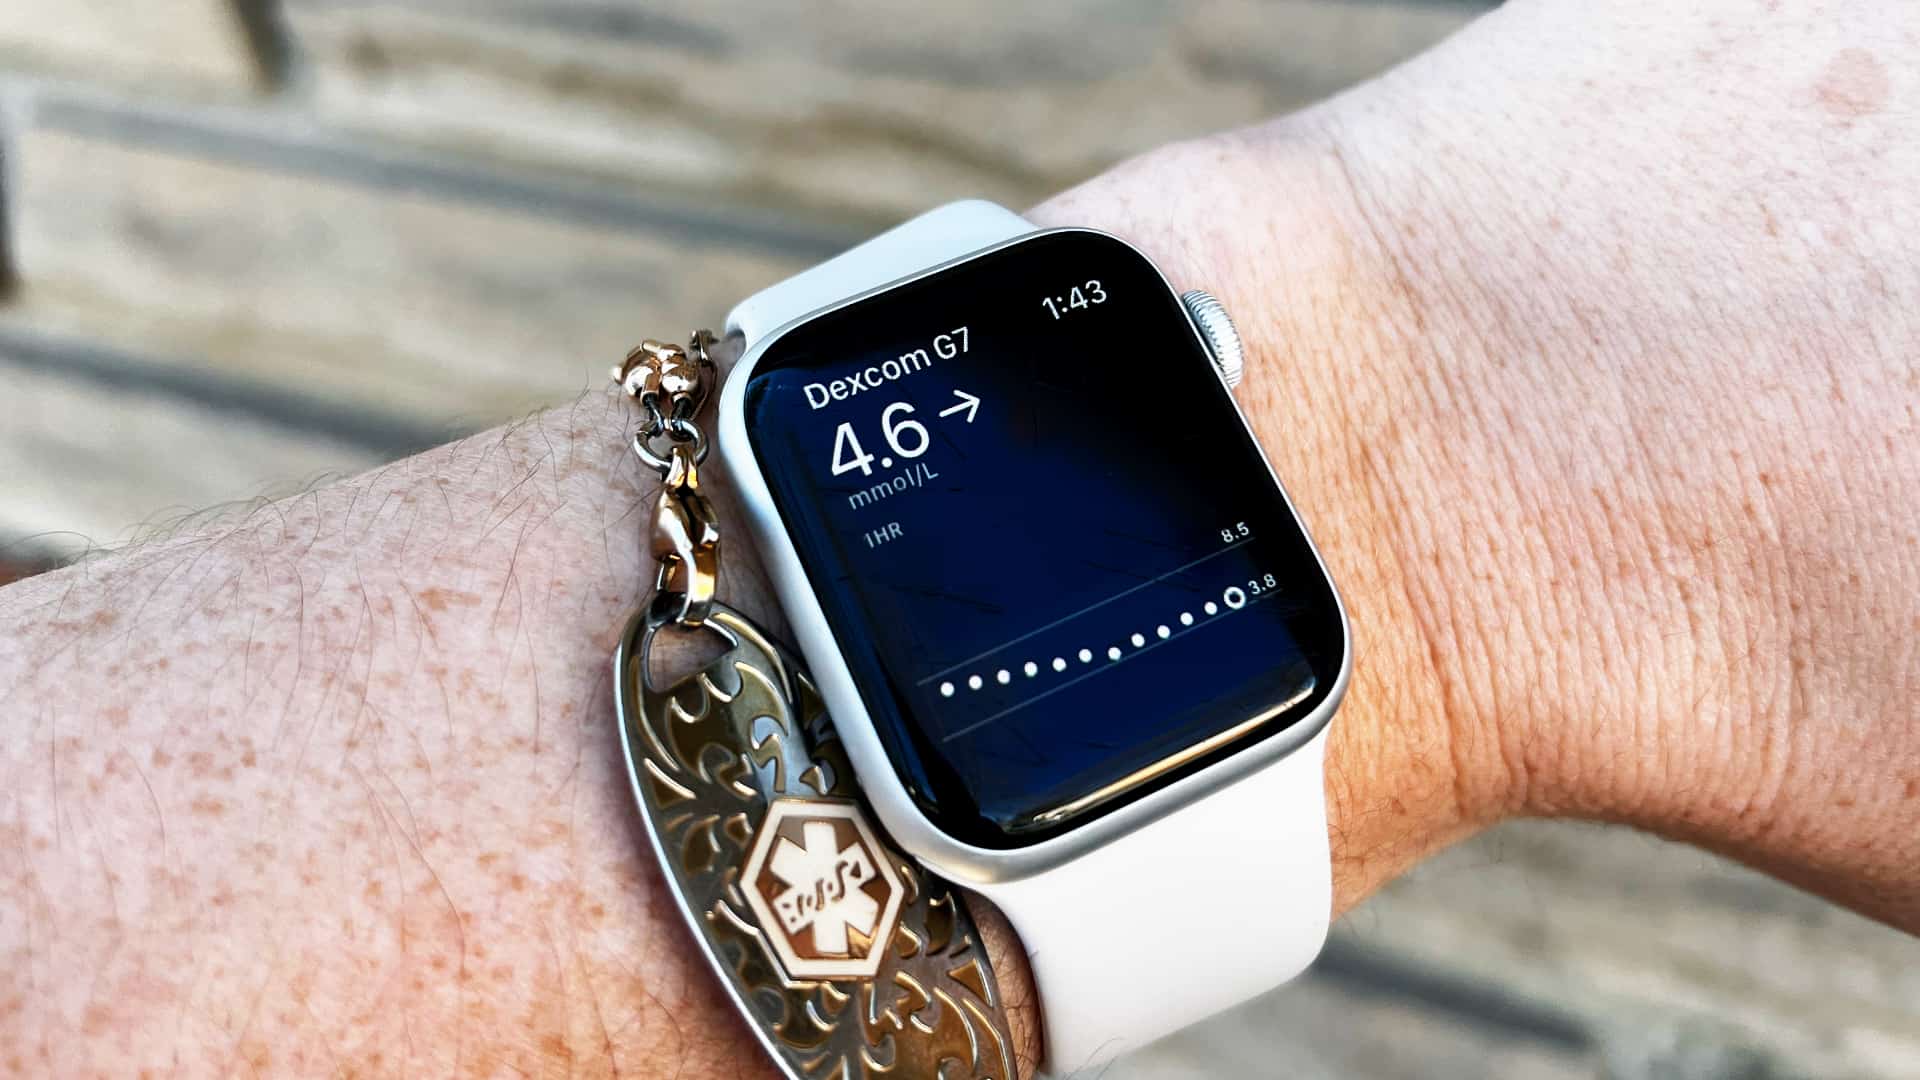
But say hello to the Dexcom G7! You can actually avoid the warm-up period when transitioning from one Dexcom G7 sensor to another, by inserting the new sensor 30 minutes before the current one expires. The Dexcom G7 actually begins its warm-up anad it’s timer wear as soon as it is inserted, as opposed to starting when you trigger the session on your app. This allows for a smooth transition without any additional warm-up time, ensuring continuous glucose monitoring. (A note that the purpose of doing this step is to avoid any gap in glucose readings, not to attempt to extend wear. The ‘timer’ on the G7 wear starts as soon as it is inserted as there is no ‘start sensor’ button in the app as there was with the G6.)
2. Make Use of Sensor Site Options
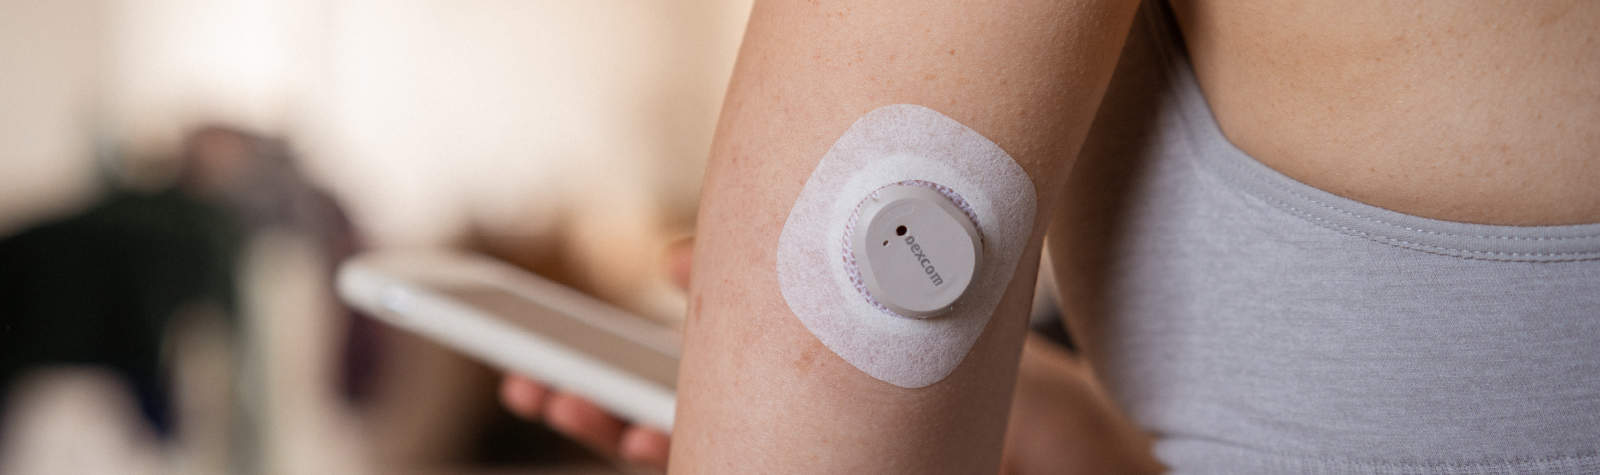
The Dexcom G7 is approved for use on the back of the upper arm, upper buttocks, and abdomen for ages 2-6, and the back of the arm and abdomen for 7+, which means you have a few areas to try out as you search for a home for your CGM sensor. This is a nice option, as well, when you think about things like backpacking and sporting gear (maybe the stomach sites aren’t a perfect fit if you’ll have a backpack strap or hockey pants rubbing!) or if you have a toddler who loves to grab those upper arm sites. Change things up to find the best home for your sensor based on what works best for YOU!
3. Securing your Sensor
Keeping the Dexcom G7 sensor secure is critical for accurate and consistent glucose monitoring. When the sensor is not secure, it can move around or become dislodged, leading to inaccurate glucose readings and interrupted monitoring, something that can really impact your day-to-day!
A dislodged or improperly secured sensor may also cause skin irritation or discomfort, making it necessary to replace the sensor prematurely, which no one likes.
Be sure you’re using the free overlay patch, which is included in each Dexcom G7 box.
Need something more? Here are a few tips for helping keep your Dexcom G7 secure:
a) Use adhesive patches or overlays
Utilize adhesive patches or overlays specifically designed for the Dexcom G7 sensor. These products provide extra adhesion and help keep the sensor securely attached to your skin. The first (and free!) option is the Dexcom overlay patch included in each G7 box. If you want something more, check out the other brands like Simpatch, GrifGrips, ExpressionMed, RockaDex and Pump Peelz offer a variety of tapes and overlays for Dexcom G7.
b) Clean and prepare the application site
Before inserting the Dexcom G7 sensor, make sure to clean the application site with an alcohol wipe. This helps remove any oils and dirt that can hinder adhesion. However, avoid using alcohol-based products on the sensor itself, as this can affect its functionality.
c) But avoid excessive cleaning
You may have heard from community members how hard it is to keep adhesives of any kind – pump sites, CGM sensors, even bandages attached when if applied immediately after a shower. Over-clean skin can strip away natural oils, making it harder for the sensor adhesive to stick effectively. This is one of those tips that has been passed on from the community over the years. Be sure to follow the manufacturer’s guidelines on cleaning and prepping the site.
d) Skin adhesive sprays
If you experience issues with adhesion, consider using a skin adhesive spray like Skin Tac. Applying a thin layer of skin adhesive before inserting the sensor can enhance its stickiness and improve longevity. Be sure to apply the adhesive wipe in a ‘donut shape’ around where you’ll insert the sensor. You don’t want to insert directly through an area that has been wiped with adhesive.
f) Areas to avoid
It is also worth mentioning that there are a few areas you should avoid when looking for maximum adhesion. These include avoiding areas with excessive hair, near a waistband, or on an area with skin folds.
Interested in trying out some overpatches, adhesives or pre-cut tapes? Here are a few of our favourites:
- Dexcom Brand Overpatches
- Skin Grip Dexcom G7 adhesive patches
- ExpressionMed Dexcom G7 overlays
- GrifGrips Dexcom G7 adhesive patches
- StayPut Medical Dexcom G7 overlays
- Skin Tac liquid adhesive
- Pump Peelz Dexcom G7 pre-cut tapes
Want to learn more about adhesives directly form Dexcom? Check out their FAQ here.
4. Consider an Online Pharmacy
If you’re someone who is new to ordering your CGM supplies from an online pharmacy this one’s for you!
Does the idea of never leaving home and having your supplies delivered right to your door sound like a perk to you? Check out the options from Diabetes Express through their online pharmacy. (Note: To set up auto-renewals, you need to give their office a call at 1-866-418-3392.) Diabetes Express also has some great options for folks including setting up automatic refill and delivery and you can learn about their Pump Now, Pay Later program to help give you time between when you receive your supplies and when your payment is due.